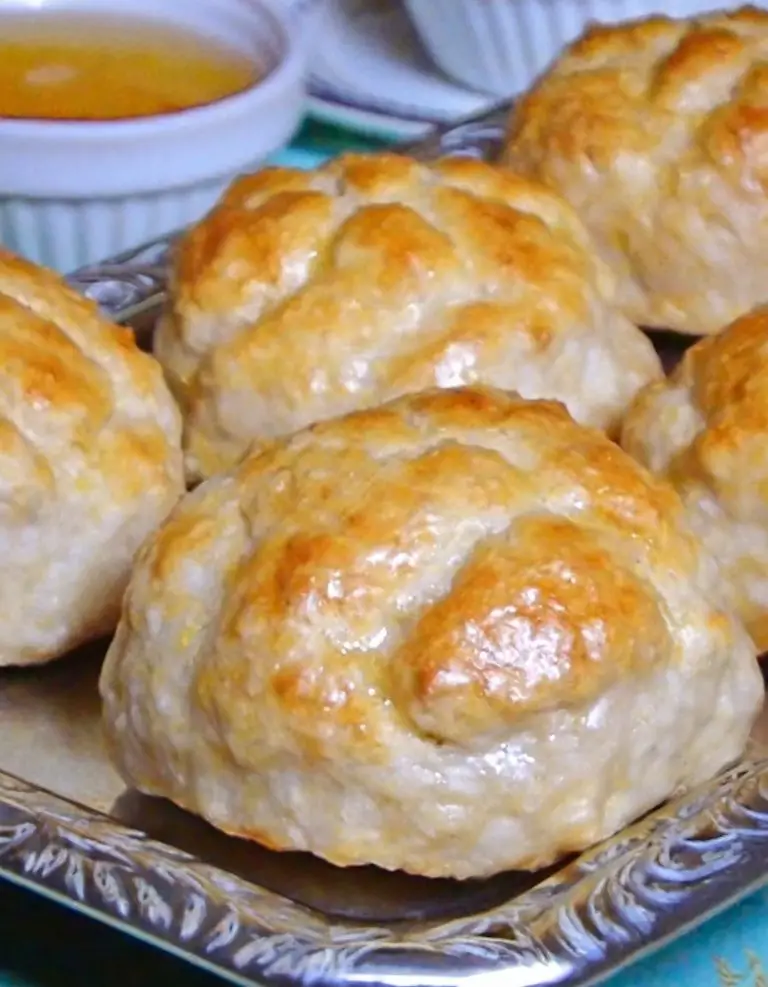
Green Onion and Cheddar Biscuits
Oh, let me tell you about my favorite green onion and cheddar biscuits! These biscuits are a delightful combination of savory flavors and fluffy texture. The sharpness of the cheddar cheese perfectly complements the mild onion taste, creating a delicious harmony in every bite.

The green onions add a pop of freshness and color, making each biscuit not only tasty but visually appealing as well. I love how these biscuits are perfect for breakfast, brunch, or as a side for dinner. They are simply irresistible!
Ingredients Needed for This Recipe
- 2 cups all-purpose flour, plus more for dusting
- 1 tablespoon baking powder
- 1/2 teaspoon baking soda
- 1 teaspoon sugar
- 3/4 teaspoon salt
- 1/2 cup (1 stick) unsalted butter, cold and cut into small pieces
- 1 cup sharp cheddar cheese, grated
- 1/4 cup green onions, thinly sliced
- 1 cup buttermilk, cold
- Extra melted butter for brushing (optional)
Instructions for Making Green Onion and Cheddar Biscuits
- Preheat your oven to 425°F (220°C). Line a baking sheet with parchment paper or lightly grease it to prevent sticking.
- Combine dry ingredients: In a large mixing bowl, whisk together the all-purpose flour, baking powder, baking soda, sugar, and salt.
- Cut in the butter: Add the cold, cubed butter to the flour mixture. Using a pastry blender or your fingertips, cut the butter into the flour until the mixture resembles coarse crumbs. It’s okay if some larger pieces of butter remain; they’ll contribute to the flakiness of the biscuits.
- Add cheese and green onions: Stir in the grated cheddar cheese and sliced green onions until evenly distributed.
- Incorporate the buttermilk: Pour in the cold buttermilk and stir with a fork or spatula just until the dough comes together. Avoid over-mixing to ensure the biscuits remain tender.
- Form the biscuits: Turn the dough out onto a lightly floured surface and gently knead it a few times to bring it together. Pat the dough into a rectangle about 1 inch thick. Use a biscuit cutter or a sharp knife to cut the biscuits into your desired shape and size. Re-form the scrap dough and continue cutting until all the dough is used.
- Bake: Place the biscuits on the prepared baking sheet, making sure they’re spaced about 2 inches apart. If desired, brush the tops of the biscuits with melted butter for a golden finish.
- Baking time: Bake in the preheated oven for 12-15 minutes or until the biscuits are golden brown on top and a toothpick inserted into the center comes out clean.
- Cool and serve: Remove the biscuits from the oven and let them cool on the baking sheet for a few minutes before transferring them to a wire rack to cool slightly. Serve warm.
Tips for Perfecting the Recipe
Use Cold Butter: The key to flaky biscuits is using cold butter. This ensures that the butter doesn’t fully incorporate into the flour before baking. During baking, the butter melts, creating steam pockets that result in flaky layers. For best results, you can even freeze the butter and grate it into the flour mixture.
Avoid Over-Mixing: When combining the wet and dry ingredients, mix just until the dough comes together. Over-mixing can lead to gluten development, making the biscuits tough instead of tender.
Pat, Don’t Roll: When shaping your dough, avoid using a rolling pin, which can deflate the dough. Instead, gently pat the dough to your desired thickness to keep as much air in the dough as possible.
Sharp Biscuit Cutter: If using a biscuit cutter, ensure it’s sharp. A dull cutter can seal the edges of the dough, preventing the biscuits from rising properly. Press straight down without twisting.
Buttermilk Substitute: If you don’t have buttermilk, you can make a quick substitute by adding 1 tablespoon of lemon juice or white vinegar to a cup of milk and letting it sit for 5-10 minutes until it slightly curdles.
Customize Your Add-Ins: While green onions and cheddar are a classic combination, feel free to experiment with other cheeses, herbs, or even cooked bacon bits to customize the flavor.
Bake on Upper Rack: For an even golden-brown top, bake the biscuits on the upper rack of your oven. If your oven has hot spots, rotate the baking sheet halfway through baking.
Serving Suggestions
Breakfast Sandwiches: Slice the biscuits in half and fill them with eggs, cheese, and bacon or sausage for a hearty breakfast sandwich.
With Soups and Stews: Serve these biscuits alongside your favorite soups and stews. They’re particularly good for dipping and soaking up broth.
As a Side for Salads: These savory biscuits pair wonderfully with fresh, green salads, adding a satisfying crunch and flavor contrast.
Topped with Gravy: For a Southern-inspired meal, serve the biscuits covered in sausage gravy as a delicious breakfast or brunch option.
Cheese Board Addition: Break the biscuits into smaller pieces and add them to a cheese board for an extra layer of texture and flavor.
Storage Tips
Cool Completely Before Storing: Allow the biscuits to cool completely to room temperature before storing them to prevent condensation from making them soggy.
Airtight Container: Store the biscuits in an airtight container at room temperature for up to 2 days. For longer storage, refrigerate them for up to 1 week.
Freezing: For long-term storage, freeze the biscuits on a baking sheet until solid, then transfer them to a freezer-safe bag or container. They can be frozen for up to 3 months.
Reheating: To revive the biscuits, reheat them in a 350°F (175°C) oven for 5-10 minutes or until warm. If frozen, there’s no need to thaw them before reheating; just add a few extra minutes to the oven time.
Frequently Asked Questions
Can I use regular milk instead of buttermilk? Yes, you can use regular milk with a tablespoon of lemon juice or vinegar to create a buttermilk substitute. This mixture won’t be as thick as buttermilk but will provide the necessary acidity for leavening.
How do I ensure my biscuits rise evenly? Make sure your baking powder is fresh, as it’s a key leavening agent. Also, pressing the biscuit cutter straight down without twisting helps the biscuits rise evenly.
Can I make the dough ahead of time? Yes, you can prepare the dough, cut it into biscuits, and then refrigerate them covered for up to 24 hours before baking. This can actually improve the texture and flavor of the biscuits.
Why did my biscuits turn out hard? This is often due to over-mixing the dough or overworking it when shaping. Remember to mix just until the ingredients are combined and gently pat the dough to shape it.
Can I add other ingredients to the dough? Absolutely! Feel free to experiment with different cheeses, herbs, or add-ins like bacon bits or diced jalapeños for a spicy kick.
Green Onion and Cheddar Biscuits

Ingredients
- 2 cups all-purpose flour plus more for dusting
- 1 tablespoon baking powder
- 1/2 teaspoon baking soda
- 1 teaspoon sugar
- 3/4 teaspoon salt
- 1/2 cup 1 stick unsalted butter, cold and cut into small pieces
- 1 cup sharp cheddar cheese grated
- 1/4 cup green onions thinly sliced
- 1 cup buttermilk cold
- Extra melted butter for brushing optional
Instructions
- Preheat your oven to 425°F (220°C). Line a baking sheet with parchment paper or lightly grease it to prevent sticking.
- Combine dry ingredients: In a large mixing bowl, whisk together the all-purpose flour, baking powder, baking soda, sugar, and salt.
- Cut in the butter: Add the cold, cubed butter to the flour mixture. Using a pastry blender or your fingertips, cut the butter into the flour until the mixture resembles coarse crumbs. It’s okay if some larger pieces of butter remain; they’ll contribute to the flakiness of the biscuits.
- Add cheese and green onions: Stir in the grated cheddar cheese and sliced green onions until evenly distributed.
- Incorporate the buttermilk: Pour in the cold buttermilk and stir with a fork or spatula just until the dough comes together. Avoid over-mixing to ensure the biscuits remain tender.
- Form the biscuits: Turn the dough out onto a lightly floured surface and gently knead it a few times to bring it together. Pat the dough into a rectangle about 1 inch thick. Use a biscuit cutter or a sharp knife to cut the biscuits into your desired shape and size. Re-form the scrap dough and continue cutting until all the dough is used.
- Bake: Place the biscuits on the prepared baking sheet, making sure they’re spaced about 2 inches apart. If desired, brush the tops of the biscuits with melted butter for a golden finish.
- Baking time: Bake in the preheated oven for 12-15 minutes or until the biscuits are golden brown on top and a toothpick inserted into the center comes out clean.
- Cool and serve: Remove the biscuits from the oven and let them cool on the baking sheet for a few minutes before transferring them to a wire rack to cool slightly. Serve warm.