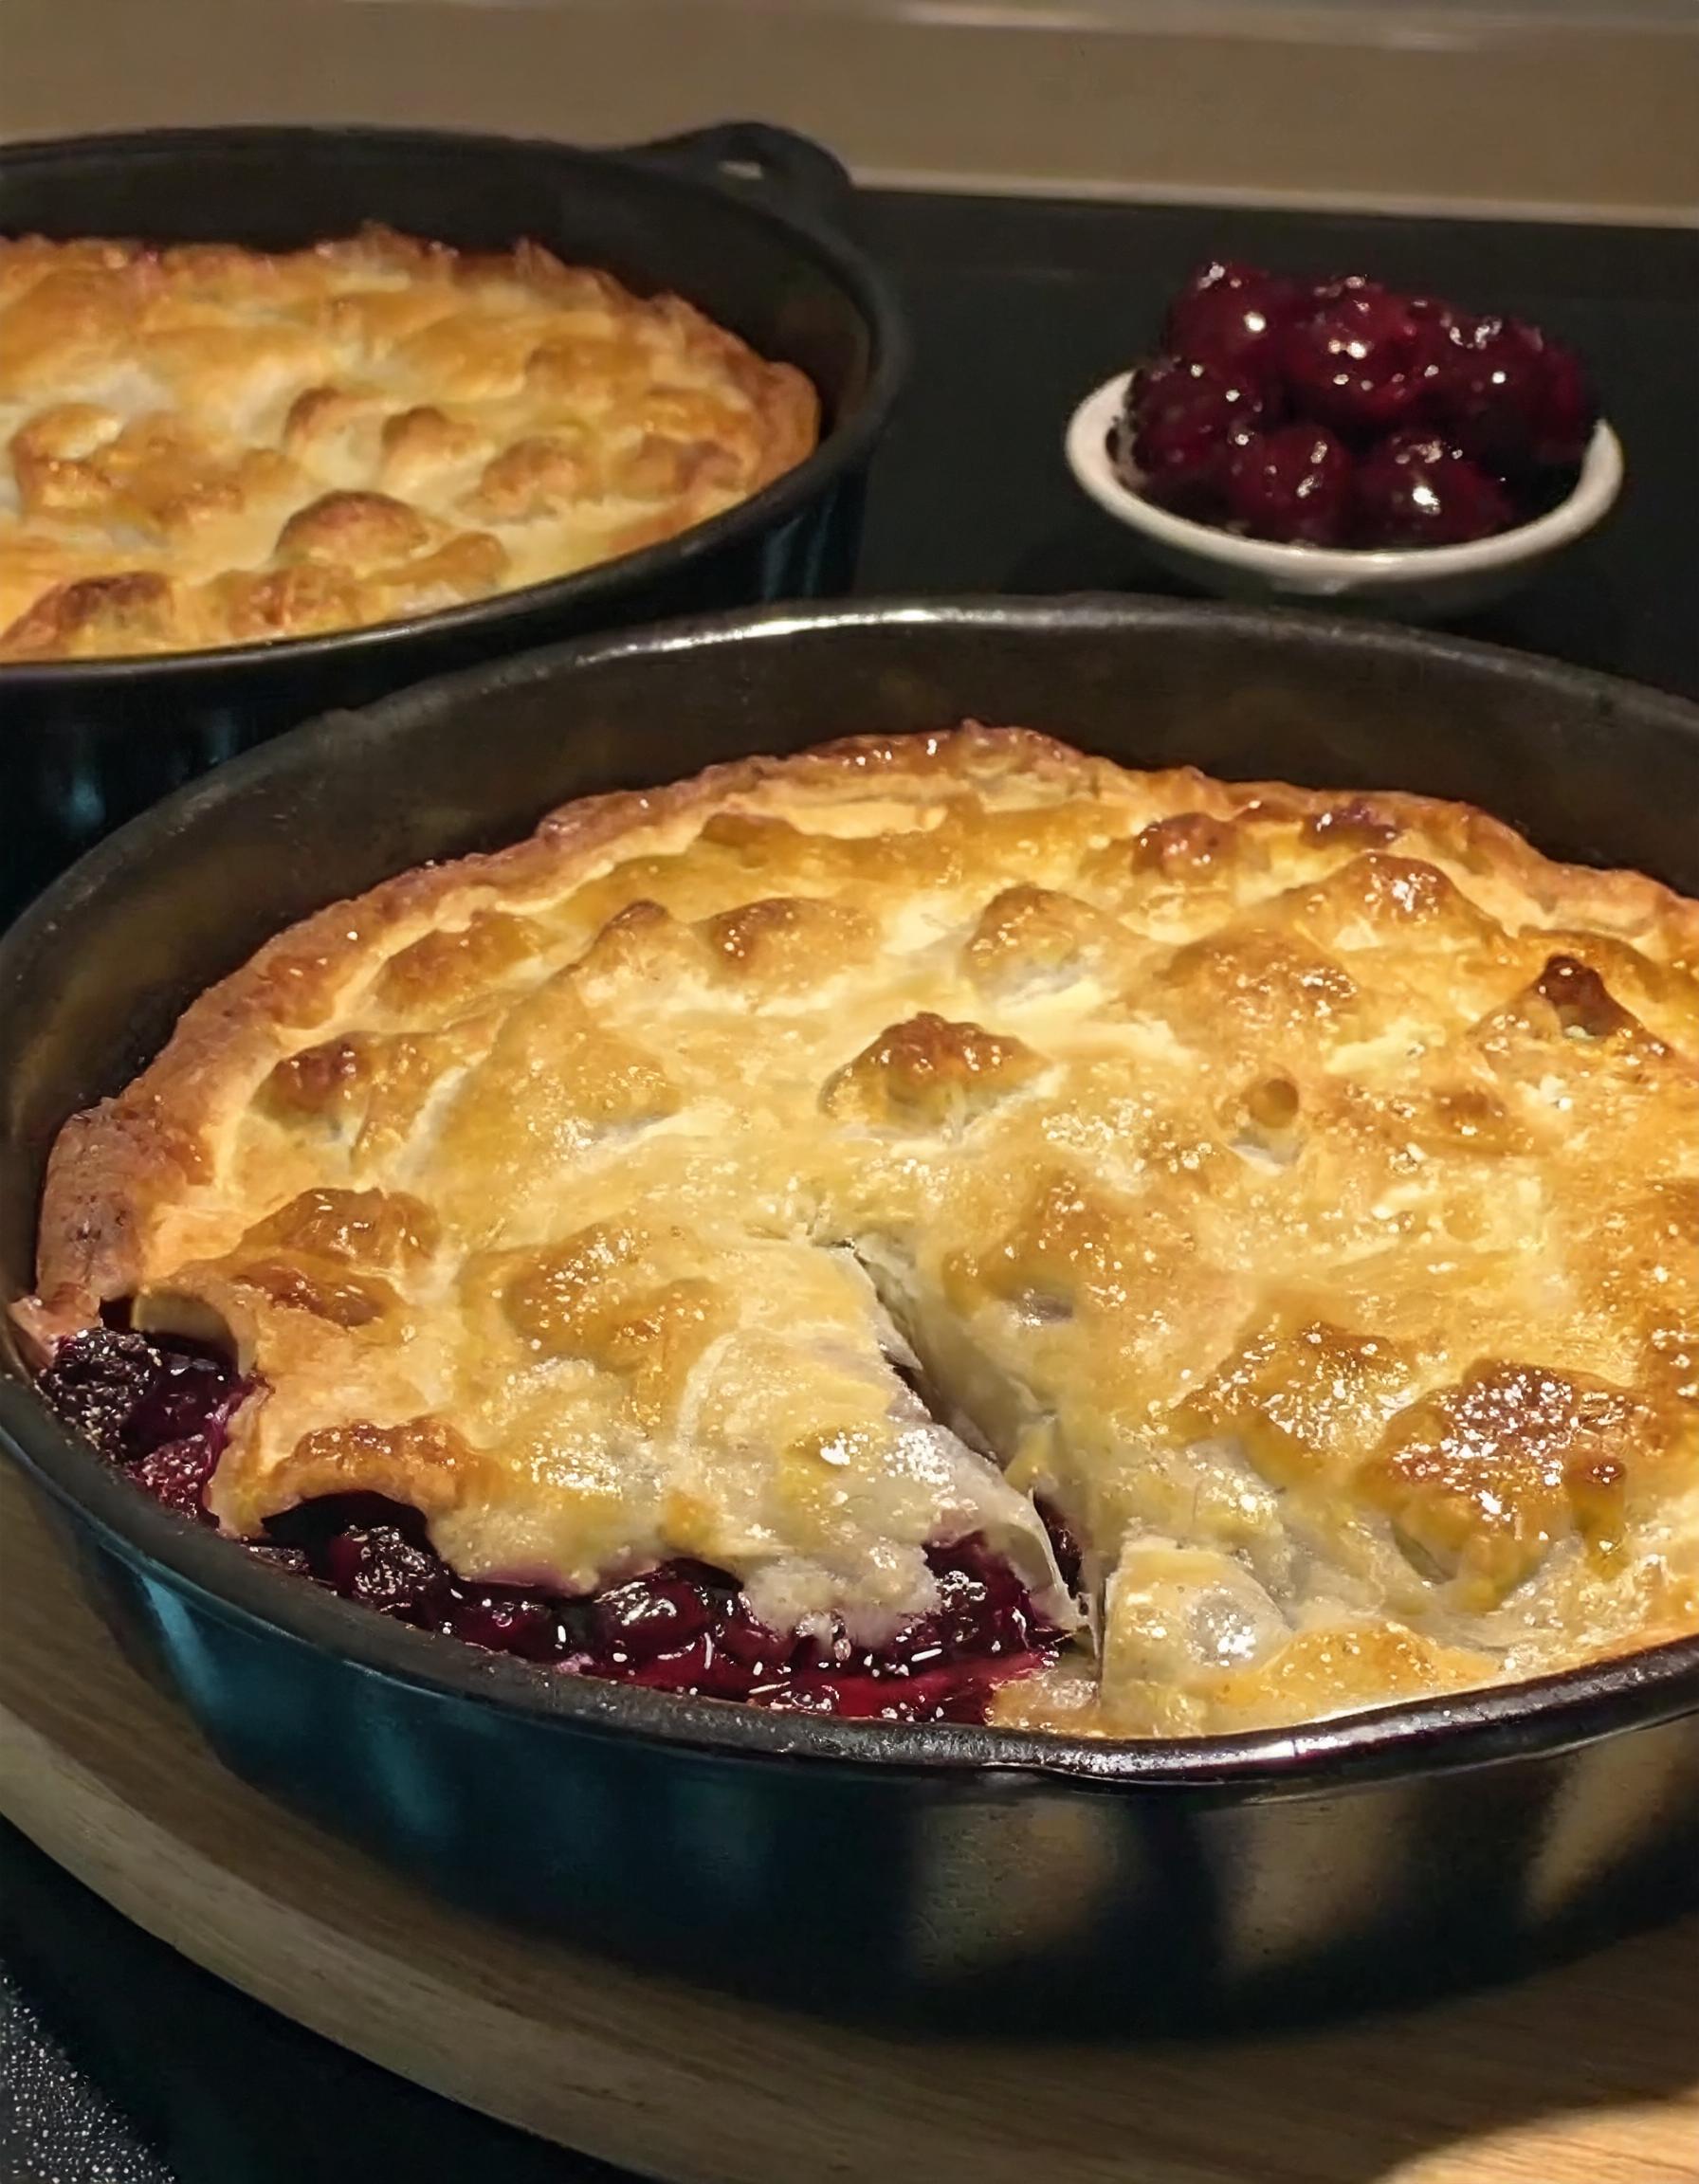
Iron Skillet Blackberry Cobbler
Oh, let me tell you about my favorite Iron Skillet Blackberry Cobbler! Imagine a warm, buttery, and sweet dessert that simply melts in your mouth. The combination of fresh blackberries cooked to perfection in a cast-iron skillet, topped with a flaky golden crust, is pure bliss.

The contrast of tart blackberries with the sweet, crumbly topping is a match made in dessert heaven. The best part? It’s so easy to make and perfect for sharing with loved ones. Trust me, once you try this irresistible treat, you’ll be hooked!
Ingredients Needed for This Recipe
- Blackberries: 4 cups of fresh or if out of season, you can use frozen blackberries, thawed and drained.
- Sugar: 1 cup, plus an additional 2 tablespoons for sprinkling on top before baking.
- All-purpose Flour: 1 ½ cups for the cobbler topping.
- Baking Powder: 2 teaspoons, to ensure the topping rises beautifully.
- Salt: ¼ teaspoon, to balance the flavors.
- Unsalted Butter: 6 tablespoons, cold and cut into small pieces, plus more for greasing the skillet.
- Whole Milk: ½ cup, to bring the dough together.
- Vanilla Extract: 1 teaspoon, to enhance the flavor of the berries and dough.
- Lemon Zest: From 1 lemon, to add brightness to the blackberries.
- Ground Cinnamon or Nutmeg (optional): ½ teaspoon, to sprinkle on top for added warmth and spice.
Instructions for Making Iron Skillet Blackberry Cobbler
- Preheat your oven to 375°F (190°C). Grease a 10-inch cast iron skillet with butter.
- Prepare the Blackberry Filling: In a large bowl, gently toss the blackberries with ½ cup of sugar and lemon zest until well combined. If the berries are very tart, you can adjust the sugar to taste. Let the mixture sit for about 10 minutes to allow the berries to release their juices.
- Make the Cobbler Topping: In a separate bowl, whisk together the flour, ½ cup of sugar, baking powder, and salt. Add the cold butter pieces to the flour mixture, and using a pastry cutter or your fingers, work the butter into the flour until the mixture resembles coarse crumbs. Stir in the milk and vanilla extract just until the dough comes together; do not overmix.
- Assemble the Cobbler: Pour the blackberry mixture into the prepared skillet. Drop spoonfuls of the cobbler topping over the blackberries, covering them as much as possible. It’s okay if some berries are peeking through; the topping will spread as it bakes.
- Bake the Cobbler: Sprinkle the top of the cobbler with the remaining 2 tablespoons of sugar and a light dusting of cinnamon or nutmeg if using. Place the skillet in the preheated oven and bake for 35-45 minutes, or until the topping is golden brown and the berry filling is bubbling.
- Cool and Serve: Allow the cobbler to cool for at least 10 minutes before serving. This dessert is best enjoyed warm, perhaps with a scoop of vanilla ice cream or a dollop of whipped cream.
Tips for Perfecting the Recipe
Choosing the Right Blackberries: The quality of your blackberries can make a big difference in the final taste of your cobbler. Fresh, in-season blackberries are ideal for their flavor and juiciness. When selecting blackberries, look for plump, dark berries without any signs of mold or squishiness. If you’re using frozen blackberries, ensure they’re fully thawed and drained to prevent excess liquid from making the cobbler soggy.
Adjusting Sugar Based on Berry Tartness: Blackberries vary in their level of sweetness and tartness, depending on the variety and ripeness. Taste your berries before preparing the filling and adjust the amount of sugar accordingly. If the berries are particularly tart, you might want to add a bit more sugar to the filling to achieve a balanced flavor.
Achieving the Perfect Cobbler Topping: The topping should be light, fluffy, and biscuit-like. The key to achieving this texture is to work the butter into the flour mixture until it resembles coarse crumbs and to stir in the milk and vanilla extract just until the dough comes together. Overworking the dough can result in a tough topping, so mix just until the ingredients are combined.
Using the Right Skillet Size: The recipe calls for a 10-inch cast iron skillet, which offers ample space for the blackberries and topping to spread and cook evenly. Using a skillet that’s too small may result in the cobbler overflowing as it bakes. If you don’t have a cast iron skillet, you can use a similar-sized baking dish, but the cooking time may vary slightly.
Baking to Perfection: Oven temperatures can vary, so keep an eye on your cobbler as it bakes. You’re looking for a golden-brown topping and a bubbly filling. If the topping browns too quickly, you can loosely cover the skillet with aluminum foil to prevent it from burning while allowing the cobbler to finish baking.
Serving Suggestions
Classic Accompaniments: There’s nothing quite like serving your Iron Skillet Blackberry Cobbler warm with a scoop of vanilla ice cream. The contrast of the warm, tart berries with the cold, sweet ice cream is divine. Alternatively, a dollop of whipped cream or even a drizzle of heavy cream can add a luxurious touch.
Add a Citrus Twist: Enhance the flavor of your cobbler by serving it with a side of lemon zest infused whipped cream or a light drizzle of lemon or orange glaze. The citrus notes can brighten up the deep flavors of the blackberries and add an extra layer of taste.
Breakfast Option: Believe it or not, cobbler can be a decadent breakfast option, especially when served alongside a dollop of Greek yogurt or a scoop of cottage cheese. The tanginess of these additions complements the sweetness of the cobbler beautifully.
Storage and Reheating: If you have leftovers, the cobbler can be stored in the refrigerator for up to three days. Reheat in a 350°F oven until warm throughout. This can help revive the topping’s crispiness, which might soften in the fridge.
Frequently Asked Questions
Can I use other fruits in this recipe? Yes, this recipe is quite versatile. Feel free to substitute the blackberries with other berries like raspberries, blueberries, or a mix of your favorites. Stone fruits like peaches or plums also work beautifully in this cobbler recipe.
What if I don’t have a cast iron skillet? If you don’t have a cast iron skillet, you can use any oven-safe baking dish of a similar size. However, the cooking time might slightly vary, so keep an eye on the cobbler as it bakes.
How do I know when the cobbler is done? The cobbler is done when the topping is golden brown and the fruit filling is bubbling vigorously around the edges. Inserting a toothpick into the topping (not into the fruit) should come out clean or with a few moist crumbs.
Can I make this cobbler in advance? While best served fresh, you can prepare the filling and the dough for the topping in advance. Store them separately in the refrigerator, and when ready to bake, assemble the cobbler. This can save time and streamline the process, especially when entertaining.
Is it necessary to peel the blackberries? No, blackberries do not require peeling. Their natural texture and flavor are perfect for baking as is. Plus, their skin contributes to the rich color and nutrient content of the cobbler.
Can I freeze the cobbler? Yes, the cobbler can be frozen either before or after baking. If freezing before baking, assemble the cobbler in a freezer-to-oven safe dish, cover tightly, and freeze. Thaw in the refrigerator overnight before baking. If freezing after baking, cool the cobbler completely before covering tightly and freezing. Reheat in the oven until warm throughout.
Iron Skillet Blackberry Cobbler
Ingredients
- Blackberries: 4 cups of fresh or if out of season you can use frozen blackberries, thawed and drained.
- Sugar: 1 cup plus an additional 2 tablespoons for sprinkling on top before baking.
- All-purpose Flour: 1 ½ cups for the cobbler topping.
- Baking Powder: 2 teaspoons to ensure the topping rises beautifully.
- Salt: ¼ teaspoon to balance the flavors.
- Unsalted Butter: 6 tablespoons cold and cut into small pieces, plus more for greasing the skillet.
- Whole Milk: ½ cup to bring the dough together.
- Vanilla Extract: 1 teaspoon to enhance the flavor of the berries and dough.
- Lemon Zest: From 1 lemon to add brightness to the blackberries.
- Ground Cinnamon or Nutmeg optional: ½ teaspoon, to sprinkle on top for added warmth and spice.
Instructions
- Preheat your oven to 375°F (190°C). Grease a 10-inch cast iron skillet with butter.
- Prepare the Blackberry Filling: In a large bowl, gently toss the blackberries with ½ cup of sugar and lemon zest until well combined. If the berries are very tart, you can adjust the sugar to taste. Let the mixture sit for about 10 minutes to allow the berries to release their juices.
- Make the Cobbler Topping: In a separate bowl, whisk together the flour, ½ cup of sugar, baking powder, and salt. Add the cold butter pieces to the flour mixture, and using a pastry cutter or your fingers, work the butter into the flour until the mixture resembles coarse crumbs. Stir in the milk and vanilla extract just until the dough comes together; do not overmix.
- Assemble the Cobbler: Pour the blackberry mixture into the prepared skillet. Drop spoonfuls of the cobbler topping over the blackberries, covering them as much as possible. It’s okay if some berries are peeking through; the topping will spread as it bakes.
- Bake the Cobbler: Sprinkle the top of the cobbler with the remaining 2 tablespoons of sugar and a light dusting of cinnamon or nutmeg if using. Place the skillet in the preheated oven and bake for 35-45 minutes, or until the topping is golden brown and the berry filling is bubbling.
- Cool and Serve: Allow the cobbler to cool for at least 10 minutes before serving. This dessert is best enjoyed warm, perhaps with a scoop of vanilla ice cream or a dollop of whipped cream.