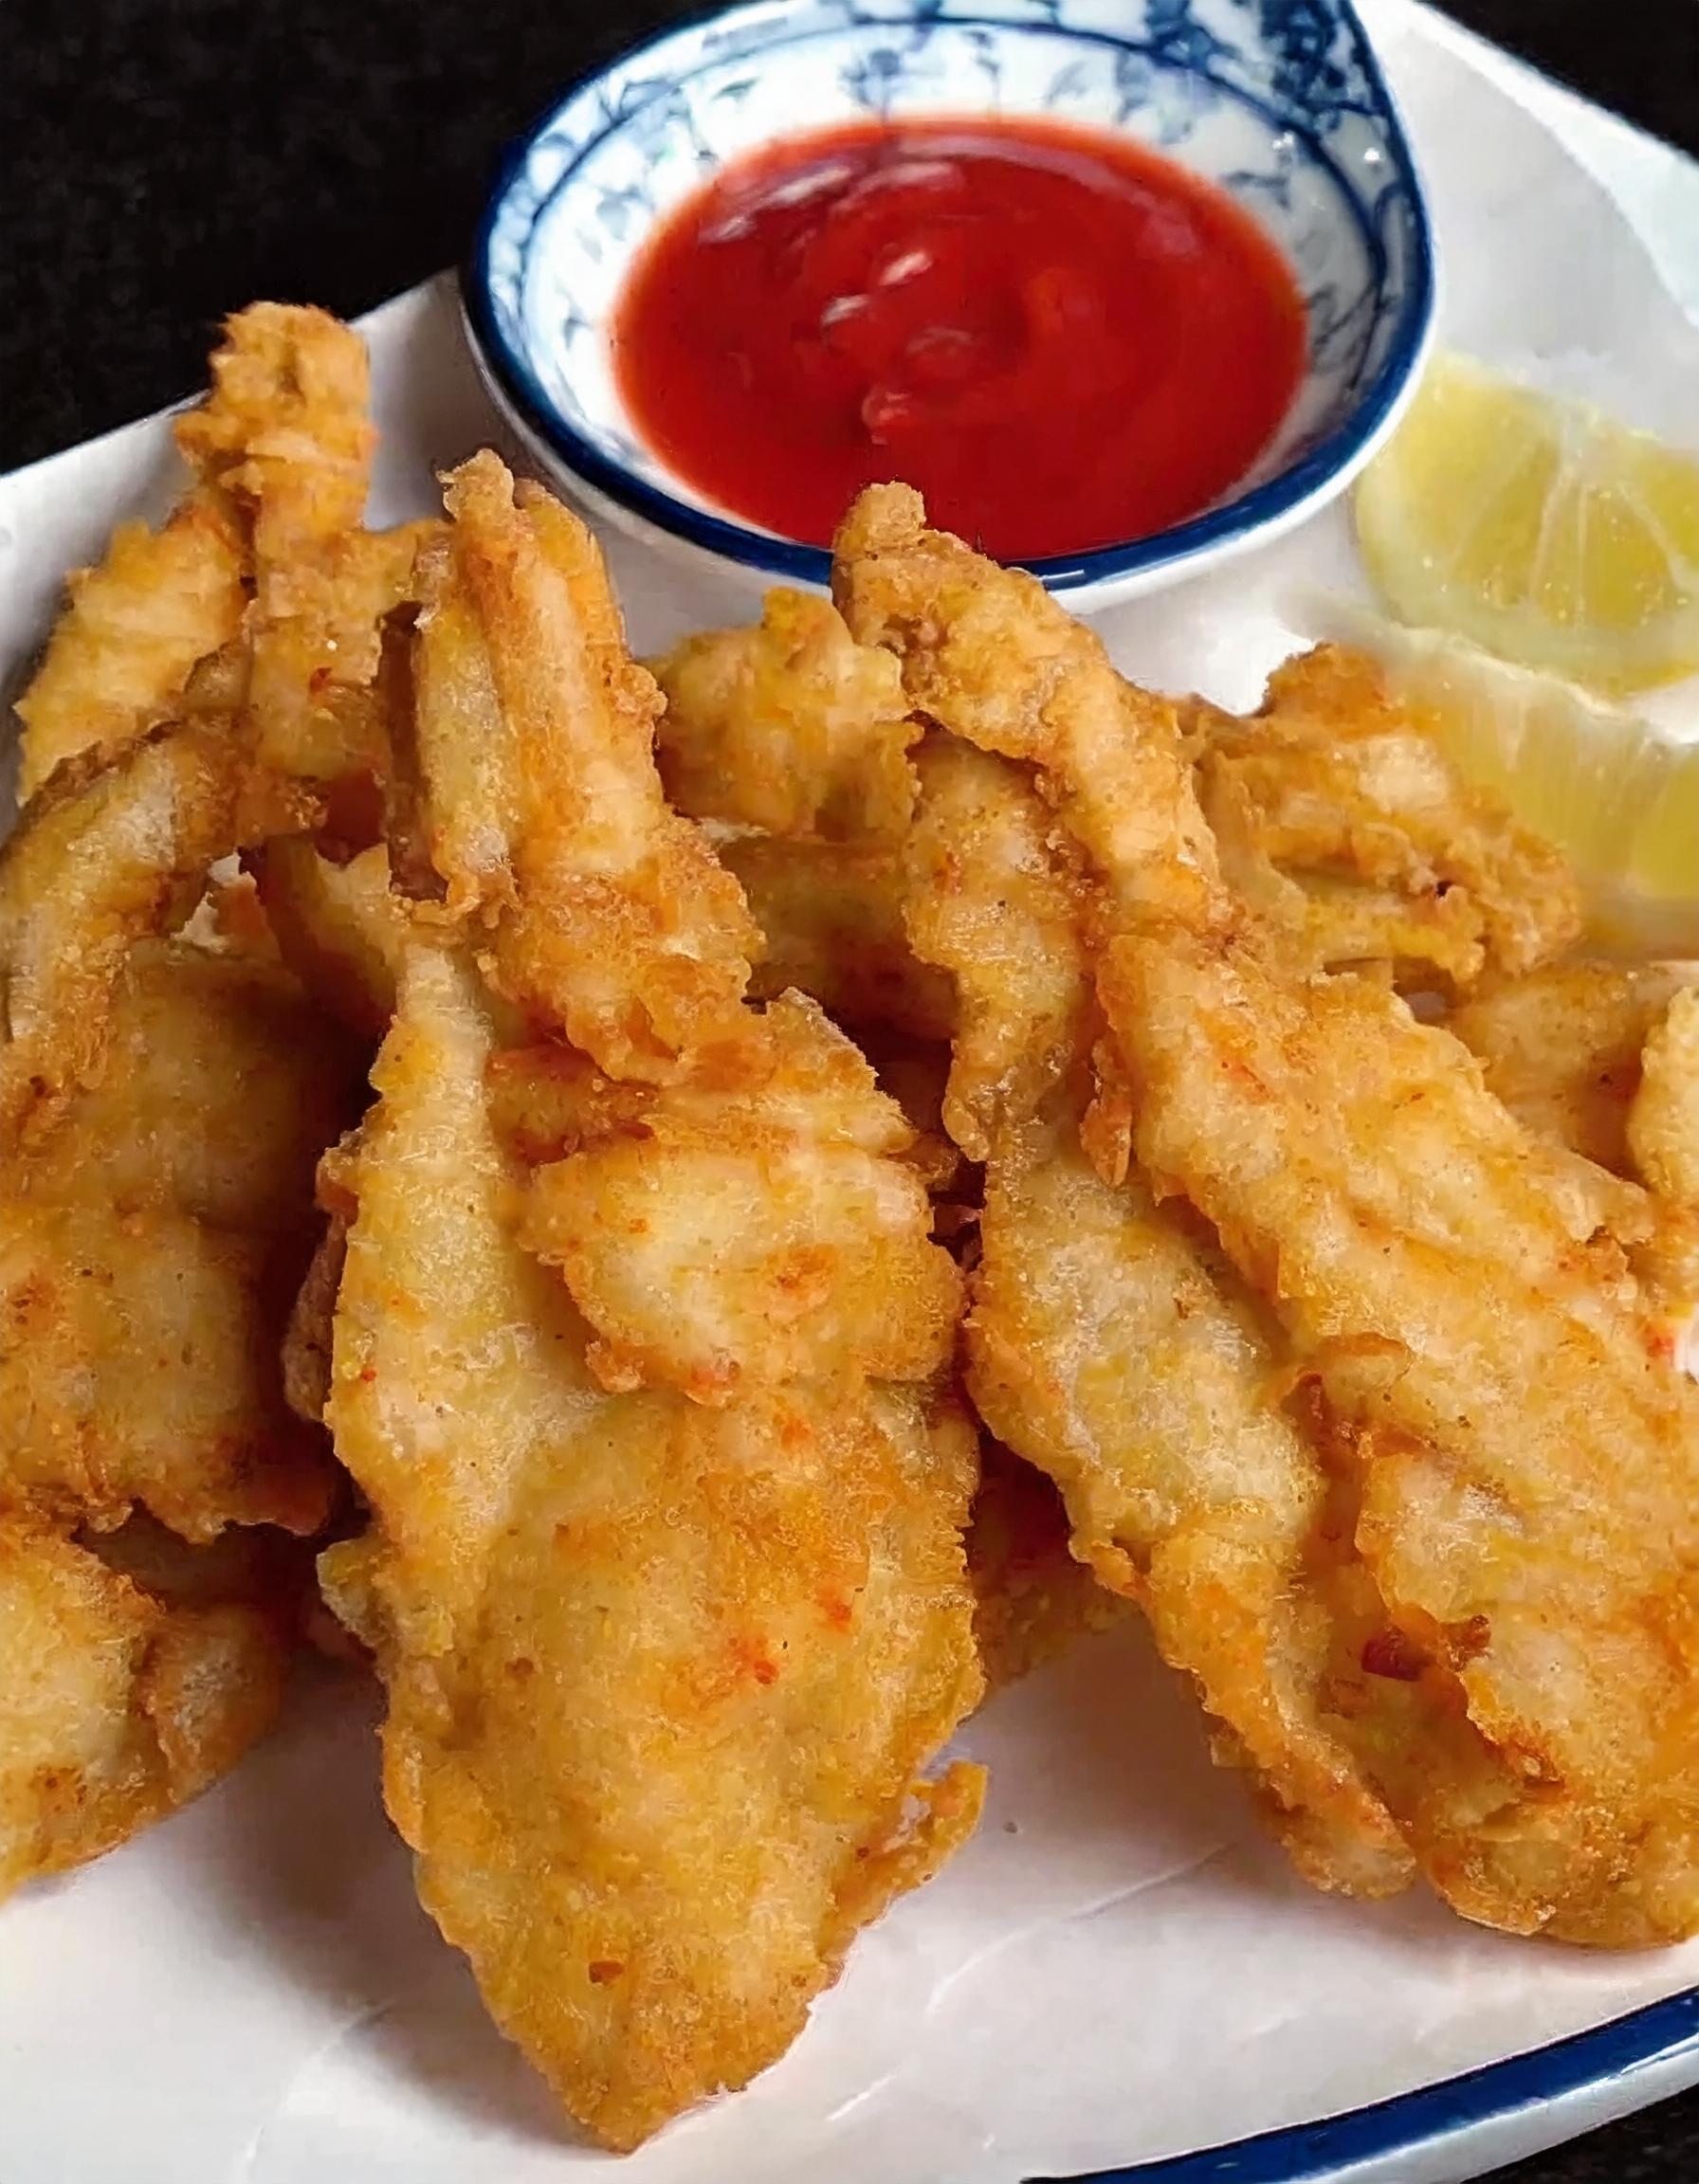
Light & Crispy Japanese Chicken Tempura
I absolutely adore light and crispy Japanese chicken tempura. The way the thinly sliced chicken is coated in a delicate, airy batter and fried to perfection always leaves me craving for more.

The texture is simply divine – crunchy on the outside, while the chicken remains tender and juicy on the inside. Each bite is a delightful combination of flavors, with a subtle hint of sweetness and umami from the sauce. It’s a true culinary delight that never fails to brighten my day.
Ingredients Needed for This Recipe
Chicken:
- 1 lb (450g) chicken breast, cut into strips or bite-sized pieces
Tempura Batter:
- 1 cup (120g) all-purpose flour
- 1/4 cup (30g) cornstarch
- 1/2 teaspoon (2g) baking powder
- 1/2 teaspoon (2g) salt
- 1 large egg, lightly beaten
- 1 cup (240ml) ice-cold water
For Frying:
- Vegetable oil, for deep frying
For Serving (optional)
- Tempura dipping sauce or sea salt
- Lemon wedges
- Grated daikon radish
Instructions for Making Light & Crispy Japanese Chicken Tempura
- Prepare the Chicken: Begin by cutting the chicken breast into strips or bite-sized pieces. Pat the chicken dry with paper towels to remove any excess moisture. This helps the batter adhere better to the chicken.
- Make the Tempura Batter: In a large mixing bowl, sift together the all-purpose flour, cornstarch, baking powder, and salt. In a separate bowl, mix the lightly beaten egg with the ice-cold water. Add the wet ingredients to the dry ingredients and gently mix. It’s crucial not to overmix the batter; lumps are perfectly fine and contribute to the lightness of the tempura.
- Heat the Oil: Fill a deep pan or fryer with vegetable oil, about 2-3 inches deep, and heat it to 350°F (175°C). Use a thermometer to ensure the oil is at the right temperature for frying, which is key to achieving that light and crispy texture.
- Dip and Fry the Chicken: Once the oil is hot, dip the chicken pieces into the tempura batter to coat them evenly, then gently place them in the hot oil. Do not overcrowd the pan; fry in batches if necessary. Fry the chicken until it’s golden brown and crispy, about 3-4 minutes, depending on the size of the pieces.
- Drain and Serve: Remove the chicken tempura from the oil and drain on a wire rack or paper towels to remove excess oil. Serve hot with tempura dipping sauce or a sprinkle of sea salt, accompanied by lemon wedges and grated daikon radish if desired.
Tips for Perfecting the Recipe
Use Ice-Cold Water for the Batter: The temperature of the water is crucial for achieving the perfect tempura batter. Ice-cold water helps to prevent gluten formation in the flour, ensuring the batter stays light and crispy. Consider chilling the water in the freezer for a few minutes before using it if you haven’t already.
Do Not Overmix the Batter: When combining the wet and dry ingredients for the tempura batter, mix just until they’re incorporated. Overmixing can activate the gluten in the flour, leading to a heavier, doughier coating. Lumps in the batter are not only acceptable but desired for creating that classic tempura texture.
Fry at the Right Temperature: Maintaining the oil at the correct temperature (350°F or 175°C) is essential for tempura. Too hot, and the batter will brown too quickly without cooking the chicken through. Too cool, and the chicken will absorb excess oil, becoming greasy and soggy. Use a thermometer to monitor the oil’s temperature throughout the frying process.
Use the Right Oil: Choose an oil with a high smoke point and neutral flavor, such as vegetable, canola, or peanut oil, for frying. These oils ensure that your tempura will cook evenly and taste clean, without any overpowering flavors.
Dry the Chicken Thoroughly: Pat the chicken pieces dry with paper towels before dipping them into the batter. Removing excess moisture helps the batter adhere better to the chicken, resulting in a more uniform and crispy coating.
Fry in Batches: Avoid overcrowding the pan when frying the tempura. Cooking too many pieces at once can lower the oil’s temperature and cause the chicken to cook unevenly. Fry in small batches to maintain the oil temperature and ensure each piece is perfectly crispy.
Drain Properly: After frying, transfer the tempura to a wire rack set over a baking sheet or paper towels. This allows excess oil to drain away without making the bottom of the tempura soggy, keeping it crispy until served.
Serving Suggestions
Tempura Dipping Sauce: Serve your chicken tempura with a traditional dipping sauce made from dashi, soy sauce, mirin, and a hint of sugar. This savory, slightly sweet sauce complements the light crispiness of the tempura perfectly.
Grated Daikon Radish: Offering grated daikon radish on the side adds a refreshing, slightly spicy contrast to the richness of the tempura. It’s also believed to aid in digestion.
Lemon Wedges: A squeeze of fresh lemon juice over the hot tempura can enhance its flavors, adding a bright, acidic note that cuts through the richness of the fried batter.
Salt: Sometimes, simplicity is best. Serving your chicken tempura with just a sprinkle of sea salt can highlight the natural flavors of the chicken and the delicate crispiness of the batter.
Rice and Vegetables: For a more complete meal, serve the chicken tempura with steamed rice and a side of sautéed or steamed vegetables. This balances the meal and adds nutritional variety.
Storage Tips
Cool Before Storing: Allow the tempura to cool to room temperature before storing to prevent condensation from making it soggy.
Refrigeration: Store leftover chicken tempura in an airtight container in the refrigerator for up to 2 days. Be aware that the batter will lose some of its crispiness over time.
Freezing: For longer storage, you can freeze the tempura on a baking sheet until solid, then transfer it to a freezer-safe bag or container. Frozen tempura can be kept for up to a month. However, the texture may not be as crisp upon reheating.
Reheating: To restore the tempura’s crispiness, reheat it in an oven or toaster oven at 350°F (175°C) for about 10 minutes or until heated through and crispy again. Avoid microwaving, as it will make the tempura soggy.
Frequently Asked Questions
Can I use other types of meat or vegetables for tempura? Yes, tempura batter can be used with a wide variety of ingredients, including shrimp, fish, sweet potatoes, mushrooms, and green beans. The key is to cut the ingredients into pieces that will cook through in the short frying time.
Is there a gluten-free version of this recipe? To make gluten-free tempura, substitute the all-purpose flour with a gluten-free flour blend and ensure that your baking powder and cornstarch are gluten-free. Note that the texture might be slightly different but still delicious.
Can I make the batter ahead of time? For the best results, it’s recommended to make the tempura batter right before you plan to use it. The ice-cold water and the lightly mixed batter contribute to the tempura’s light and crispy texture, which can be lost if the batter sits for too long.
Why does my tempura absorb so much oil? Tempura might absorb excessive oil if the oil temperature is too low, if the batter is overmixed, or if the chicken wasn’t dried properly before coating. Ensure your oil is hot enough, mix the batter minimally, and thoroughly dry the chicken to prevent oil absorption.
Can I air fry chicken tempura? While traditional tempura is deep-fried to achieve its characteristic texture, you can use an air fryer for a healthier version. The results will not be exactly the same, as the air fryer will not produce as light and crispy a coating, but it can still be delicious. Spray the battered chicken lightly with oil and air fry at 400°F (200°C) for about 10-15 minutes, flipping halfway through, until cooked through and crispy.
Light & Crispy Japanese Chicken Tempura
Ingredients
Chicken:
- 1 lb 450g chicken breast, cut into strips or bite-sized pieces
Tempura Batter:
- 1 cup 120g all-purpose flour
- 1/4 cup 30g cornstarch
- 1/2 teaspoon 2g baking powder
- 1/2 teaspoon 2g salt
- 1 large egg lightly beaten
- 1 cup 240ml ice-cold water
For Frying:
- Vegetable oil for deep frying
For Serving (optional):
- Tempura dipping sauce or sea salt
- Lemon wedges
- Grated daikon radish
Instructions
- Prepare the Chicken: Begin by cutting the chicken breast into strips or bite-sized pieces. Pat the chicken dry with paper towels to remove any excess moisture. This helps the batter adhere better to the chicken.
- Make the Tempura Batter: In a large mixing bowl, sift together the all-purpose flour, cornstarch, baking powder, and salt. In a separate bowl, mix the lightly beaten egg with the ice-cold water. Add the wet ingredients to the dry ingredients and gently mix. It’s crucial not to overmix the batter; lumps are perfectly fine and contribute to the lightness of the tempura.
- Heat the Oil: Fill a deep pan or fryer with vegetable oil, about 2-3 inches deep, and heat it to 350°F (175°C). Use a thermometer to ensure the oil is at the right temperature for frying, which is key to achieving that light and crispy texture.
- Dip and Fry the Chicken: Once the oil is hot, dip the chicken pieces into the tempura batter to coat them evenly, then gently place them in the hot oil. Do not overcrowd the pan; fry in batches if necessary. Fry the chicken until it’s golden brown and crispy, about 3-4 minutes, depending on the size of the pieces.
- Drain and Serve: Remove the chicken tempura from the oil and drain on a wire rack or paper towels to remove excess oil. Serve hot with tempura dipping sauce or a sprinkle of sea salt, accompanied by lemon wedges and grated daikon radish if desired.